Often times you will have a need to create an advance find query so that you can narrow down leads, accounts or contacts in Dynamics 365/CRM based on determined criteria. Perhaps you may want to create a calling list to Finance Managers in a specific zip/postal code.
Once you create this query, you can export it to Excel allowing you to show your team or manager your list. This query can be named and saved for later use – Saved Views.
Here is what you will need to do to create a query using the advance find.
Go to advance find. This is done by clicking on the funnel icon.

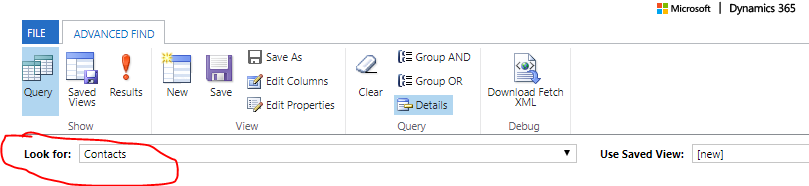
Next you need to decide if you are targeting Leads, Accounts, or Contacts. For our example, you will be targeting contacts. In the Look for: drop down field, select Contacts.
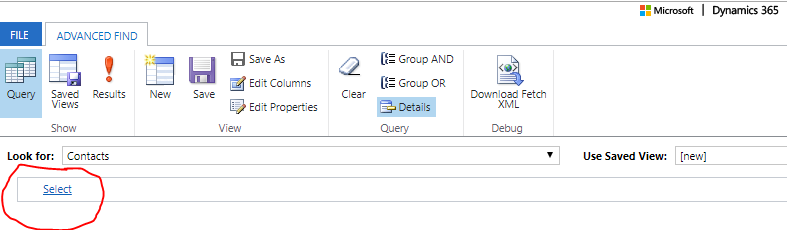
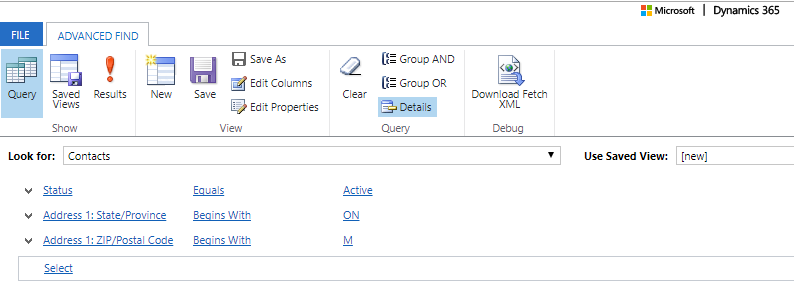
Next step is creating your query. Perhaps you may want to find all of your active finance contacts that are not decision makers or influencers, that live in Toronto GTA Ontario region. First step to creating your query is click on the Select link to see the drop down field choices.
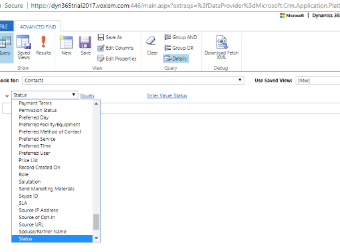
Click on your choice and add it to your query. In our example, your first selection is: Status Equals Active. Therefore, in the Select drop down menu, choose Status.
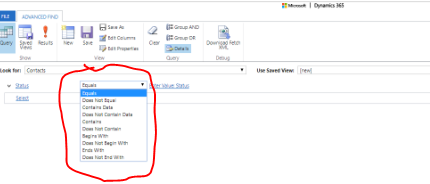
Then click on Equals.
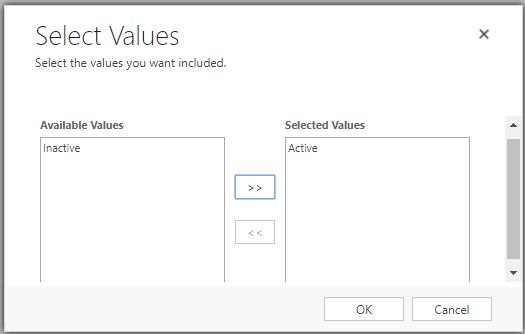
Next step is to choose Active from the drop down menu.

Then click on the >> icon to pull Active to the Selected Values on the right side.
To narrow your search to just Ontario with zip/postal code that begins with M, choose Begins With so that all M postal codes will be on your list and both Ontario and ON will be found in the Province field.
Then select Job Title and state the one that you wanted to tailor your list to. In your example, you want just Finance Manager and CFO contacts. Therefore, you will click on Select and look for Job Title. Choose Equal and type Finance Manager in the job title in the box field. On a new line do the same, add Job Title Equals CFO. Because you want both Finance Manager and CFO to be on your list, you will do the following:
Click on the V next to Job Title for both Finance Manager and CFO.
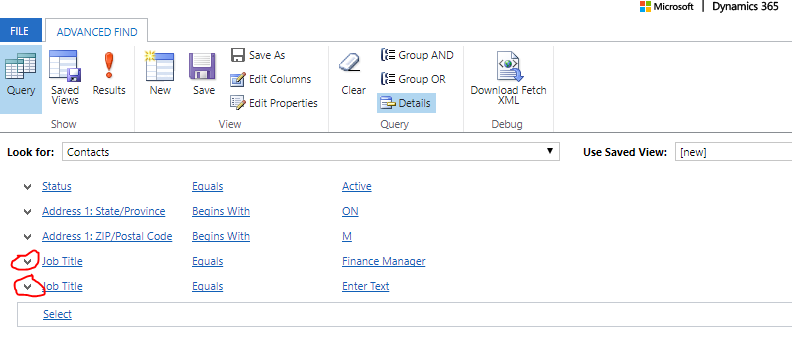 Click on Select Row for both Finance Manager and CFO from the drop-down window choices.
![]()
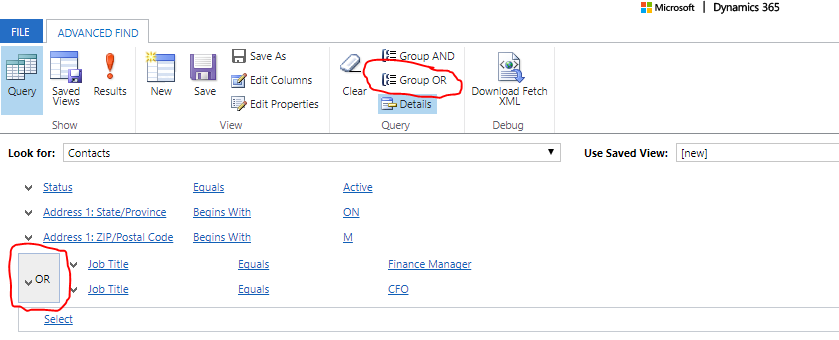
Then choose Group OR. Your list will now include both Finance Managers and CFO.
Perhaps you wanted only the Decision Makers and Influencers. Add Role Equals Decision Makers and Influencers. Click on Select and choose Role. Then select Equals and choose Decision Makers and Influencers from the drop down window. Then you will click on V next to both Or and Role and choose Select Row from the drop down menu.
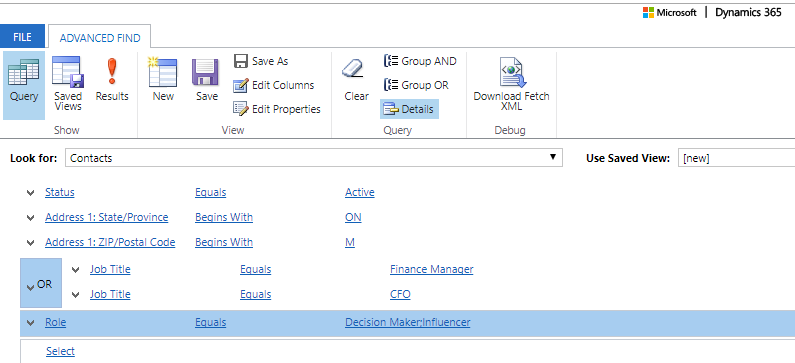
Then click on Group And at the top. This will just give you the Financial Decision Makers and Influences contacts only.
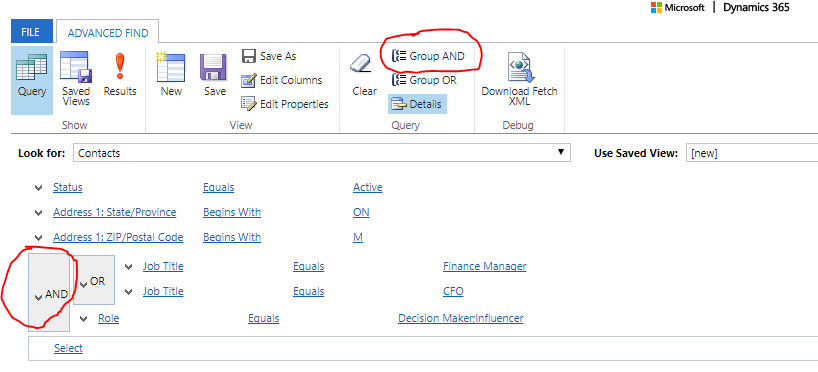
You may just want contacts that are assigned to you. Click on Select and choose Owner. Then select Equals and Current User.
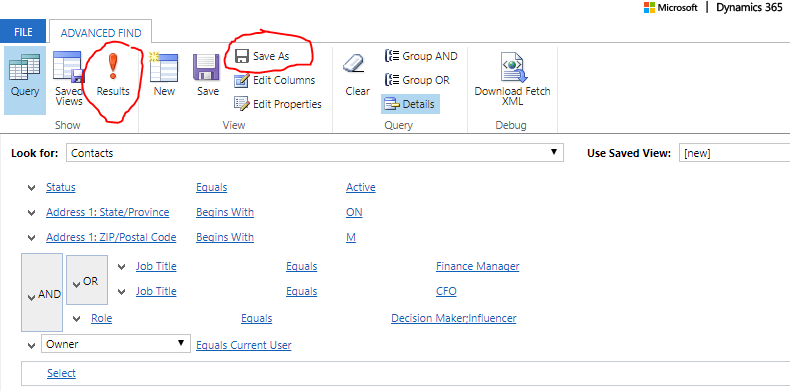
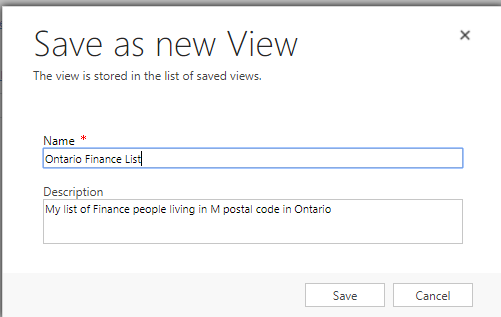
You can save this query by clicking on Save As on the menu and selecting a name.
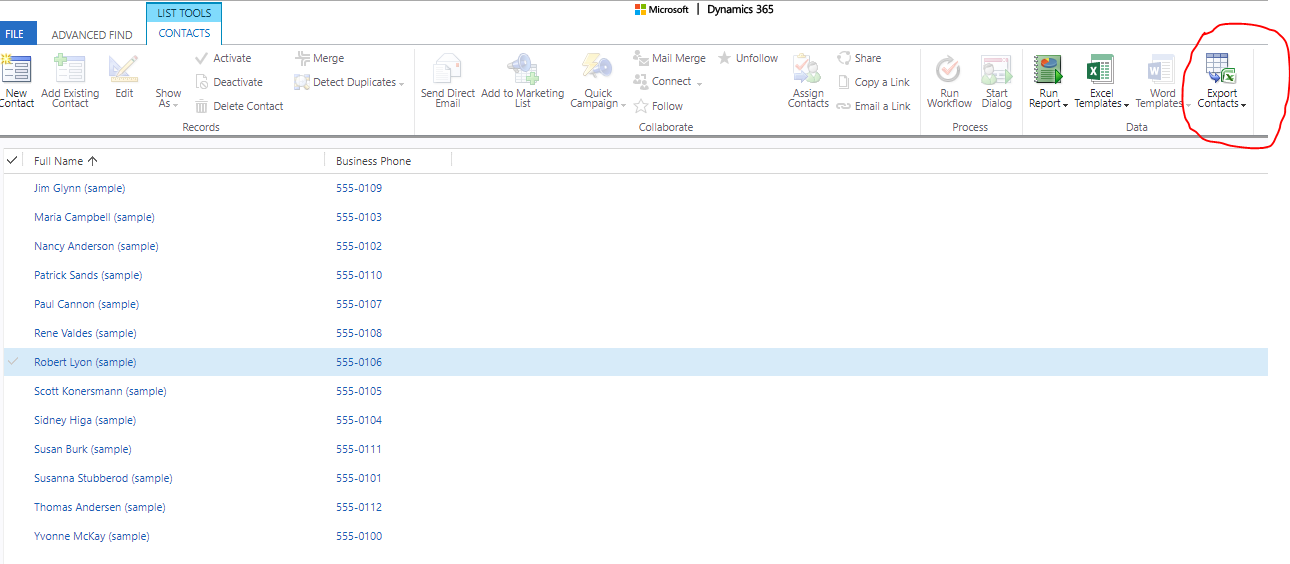
Then click on Results to view your list. You can also export your list to Excel by clicking on the Export Contacts icon located on the top right.
Find our blog tips beneficial? If you haven’t already subscribed to our newsletter, be sure to do so to learn about what’s new at Vox ISM. You can also follow us on Twitter @Vox_ISM
-Linda
Marketing Lead Generation Manager at Vox ISM, Inc.