Word templates are a new feature within Dynamics CRM 2016 that afford CRM users the ability to efficiently produce specified data on a pre-formatted word document, and are therefore able to easily distribute valuable data.
From top to bottom word templates are customizable and can be designed in multiple different ways in order to convey data from their related records. For starters, while a word template is accessible through one specified entity, the data published on them can be mapped from multiple different records. For example, an invoice word template may be created on the quote entity, but the information within this document can be gathered from accounts, opportunity, contacts, etc. The beauty of word templates is that it only needs to be created once, for a specific record, and each individual form within that record can be published on the template when needed.
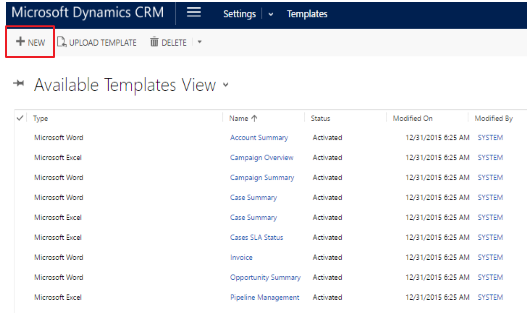
The steps in creating a word template are fairly straightforward from start to finish, beginning with navigating to Setting -> Templates -> Document Templates (below). This will take you to a list view of available templates and from here – if creating a new template – select “+ NEW”:
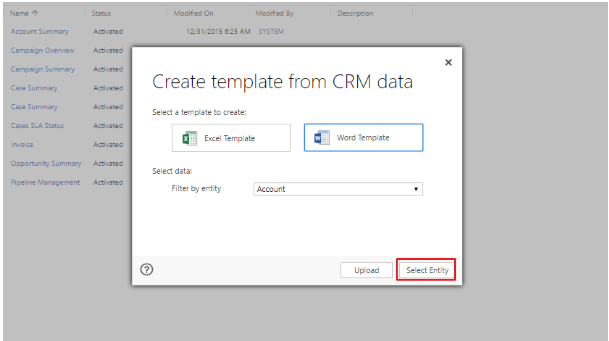
 After selecting “+NEW” you are prompted with a pop up window, select the word template icon, and then choose the entity you wish to tie the word template to, then click on “Select Entity”:
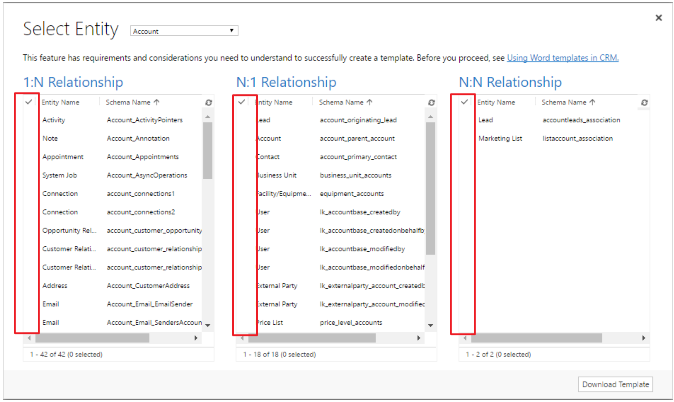
After clicking “Select Entity” you now have the ability to choose the related entities from which you with gather your data to populate the word template. When selecting multiple entities, click in the check mark column highlighted below. Once you have chosen all the entities you need, select “Download Template” in the bottom right corner, and a blank word document with download onto your computer:
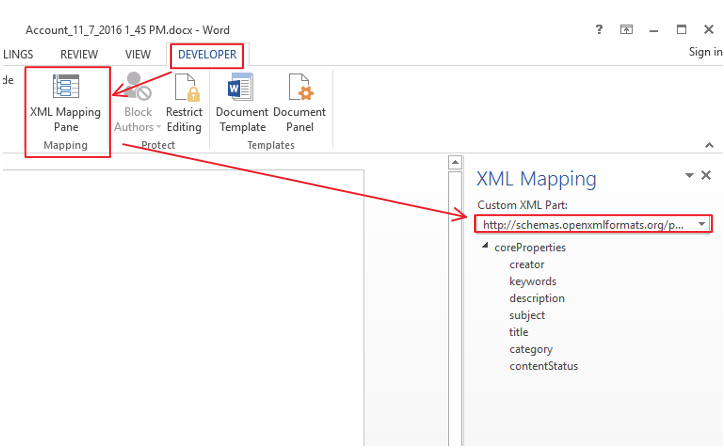
Once the template is downloaded and opened, select the “Developer” tab, then “XML Mapping Pane”, and then the drop down under XML Mapping and select the Microsoft CRM Document Template regarding the entity you chose:
*If you do not see the developer tab, simply go to File > Options > Customize Ribbon and then click the check box to enable developer tab in the main tabs section. It is also important to turn off some autocorrecting system settings, such as capitalizing the first letter of sentences and auto suggestions from spell checker. This can be done by going to File > Options > Proofing > AutoCorrect options*
After you have made a selection from the drop down you will then have a list of fields from the entities you had previously selected to be mapped. From there you have the ability to format your word template and use the fields to populate the data you need. In order to pull the field from the drop down to the word template, simply right click > Insert control > Plain Text, and the field will be visible on the word document:

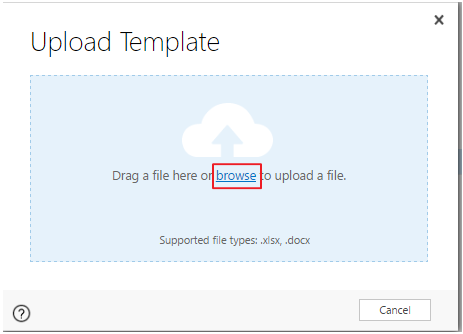
After the template has been created/saved name it appropriately in terms of what it is meant to do, if you are satisfied with the layout it’s time to upload it back into CRM. In order to do so you must go back to the template section (Settings > Template > Document Template) where you first began the process of creating a template and select “Upload Template”. From here you will be prompted with a pop-up window, select browse, select your file, open, and select upload.
Once your template has been uploaded, navigate to the entity it was created for and select a form to view. From there you will see “Word Template” in the tool bar at the top of the screen, or in the drop down from the three dots, select the word template you created:
*If you don’t see your new template, refresh the page*
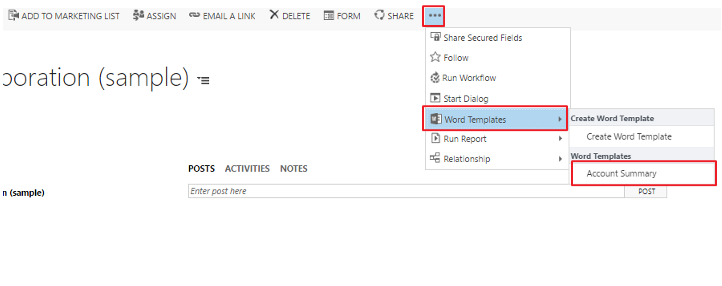
It is important to notice that from the form itself, within the Word Template section above, you have the ability to click “Create Word Template” from here as well. This will take you through the same steps of creating a word template outlined earlier, however, a word template created this way will become a personal template, meaning that it is only viewable/usable by the creator. This may come in handy if a template is specific to one user, however, company-wide templates will be ineffective if created from here.
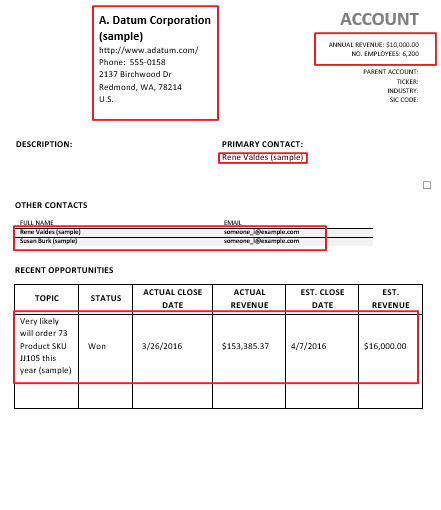
Once you have clicked on the template you wish to use, it will then export the template along with the data to a word document, and here you will be able to view the finished product. As you will see in the image below, all the highlighted data has been pulled from the chosen entity along with the corresponding mapped entities and has populated the word template. You can also see that the word template is completely customizable, including fonts, tables, layout, etc. Thus affording you the ability to create professional documentation with a standardized template usable throughout the entity it is related to.
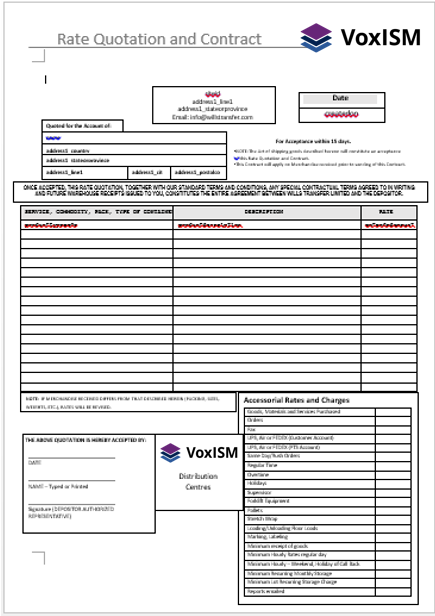
Here is an example of a completed template with formatting, ready for information to be pulled from CRM.